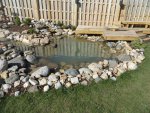
Herz, Wow, I can't believe how much work it is to seal everything. Your stream looks very realistic and I'm sure if you can get the water to go over the rocks it will look really good and worth your effort. Would it have been easier to get the water to flow over the rocks if you were on a hill? Re: timers for the electricity, I just bought an Intermatic two pole 24 hour timer for a job we are working on. They seem to make every kind of timer imaginable and now have a lot of digital timers too if you want to spend a lot of money.
Keith,
To get the water to flow over/around the rocks is easy. The waterfall foam does it on its own, what I have been trying to do is seal all the little crevace's that the water could flow through when the stream pump isn't running. I didn't leave any deep areas in the stream when i built it for the water to rest in, so now as I add the falls I am trying to seal them so the water won't leak out when it isn't running, pretty much impossible I believe, but still trying.

The dam is the biggest one I want to stop as that will hold the most water when it isn't running. I've seen a bunch of timers at Menards for outdoor all should be high enough for the amps/volts of my pump, just deciding if the stream pump and the gorge pump will both be on a timer. The stream is on a decent hill, its probably a 3' grade give or take by the time its all said and done from the top of the upper pool to the entry into the pond. Hard to see in the pictures as there is no real good reference point.
On my waterfall and then on the creek, I took the liner and folded it up over the edge of the leading waterfall rock, so it had no choice but to go over, then will be covering that edge with other rocks.

I have not used any foam but on the waterfall top, I did use some of the roof goop to stick the rocks in place and keep the water going over the first rock.

It's going to be worth it, and can't wait to see the finished project. In this case, I vote you shoot a video of the stream once you get it up and running for the year!!!
LOL Never used youtube yet country, but I might have to create an account to post things. Good news is my camera is newer and shoots in 720p.
So here is the dam as it was after I finished using the spray on rubber (I just used it all and 2 coates, figuring it would take at least 2 coats and it would only cost me $25 for all 8 bottles, so not bad if it failed).

This is the only part I did test as in it is the only part of the stream that I will continue to try to waterproof if I can. It did have a slow leak in the front of the main rock that forms the dam (obviously shows how tough it is to block all the holes for water in this type of dam, even using waterfall foam and the spray on rubber). The water level did seem like it was an inch to 2 inches higher than before, so some success there, but I wanted it all the way to the top of the dam. So I did add some roofing goop to the areas that were leaking. I did that sunday night and layered it onitself a lot, so I have left it to set since then without trying to add more water to see if it worked or not. I decided to leave it so it would set all the way through and becuase the weather has gotten cooler the last few days, we've had frost warnings the last few nights. So I will see if it worked either later today or on thursday. Will be warmer the next two days, but getting colder for the weekend (high 40's to 50 and below freezing at night). So if it works awesome, if not, well I have one more thing to try to waterproof it.
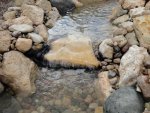
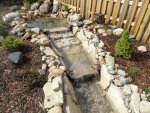
So here are the waterfalls. These are done, whether they hold back the water or not, they will enough to fill up when the stream is running so that is good enough for me.
Here is the first one:
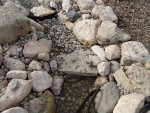
The second:

the third:

the fourth:
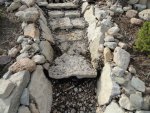
Here is the dam precaulk.
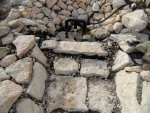
It was leaking just to the right of the center (the spot where there are no stones).
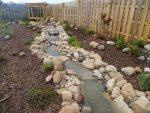
Here is the stream looking down from the upper pool:

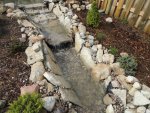
And looking up from the bottom:

Here is the stream after I refilled the pond to the top with water. You can see the goop at the base of the dam (white in color).

As you can see, I was unable to completely waterproof the 2nd waterfall as water seeped upwards through the gaps that I suspect are on the right side of the falls where I filled it with waterfall foam, but was unable to get the spray on rubber completely covering it. I can build up the sides on the pond enough so I can raise the water level by an inch. This should help offset the depth of the pond after water is removed to fill the stream as it runs. Before I added the spray on rubber, I was able to fill up all the levels of the stream by placing a hose in the upper pool and letting it run until it filled every level of the stream with water, so it isn't leaking super fast. But it also wouldn't hold water overnight, so that is why I tried the spray on rubber. It did seem to help in the upper pool and if I had sprayed it on the front of the dam better, I think it might have worked. But you really need good access to what you are going to apply it too. Worth a shot, but probably wouldn't buy it again unless it was on sale like it was.
So when I lowered the pond level to try and waterproof the stream, I also saw it as a good chance to repot the hardy water lily's I bought at menards at the end of summer last year. Here is the container they came in:
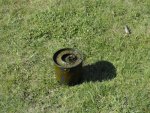
So I had some pond baskets from my Bonsai hobby and used those to repot them. I had one that I knew was growing well and so i put it in a pot by itself. I haven't read the plant section as much as I should (or really at all) but used just pea gravel to plant them all in.
Here is the one that is growing well:
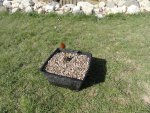
Here are the rest after I dug them out of their pots:

So the one that was growing I planted by itself in a round pot:

The rest I planted in a pot to see what comes up. There was one that showed some signs of life. If nothing comes up, I will just pull this pot out in summer when it is warm enough to jump in and get it. Here are all 3 pots at the bottom of the pond:

So my only other brainstorm that I had while getting an oil change on my truck today, was to use bricks and 2 patio landscape pavers (the 16"x16" ones) to make a koi castle/cave at the bottom of the pond for 2 purposes. The first to give the fish some shade, I would put the 2 16 landscape pavers side by side on piers so they would be a good foot off the bottom of the pond. The second reason is to get my pumps off the bottom of the pond. I thought go with the koi castle for shade instead of just using milk crates instead. I would use cinder blocks for the piers. The 4" solid ones for the base, and then the 8" ones with the holes (sitting on their side, so the fish could swim through the holes in and out) on top of those, followed by the 16" pavers on top. Anyone forsee any problems with this idea?
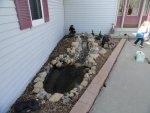
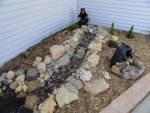
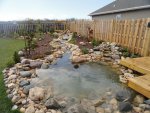
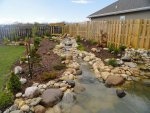
And for those who saw the pictures of the waterfall/stream I built for my mother-in-law, here are the finished pics:
