Here we go...

pondlover

Life is good today!
Joined
Jan 8, 2012
Messages
604
Reaction score
111
Location
Milan, TN
Hardiness Zone
7a
Thanks Waterbug. I'm really hoping it won't be necessary to use another piece of liner, but if we do, I know what to do now.
CE... I wish we could leave the railing off that side of deck, but our deck is a good 3 ft off the ground. I definitely like the idea and I bet the view is fabulous. I've made yet another trip to Lowes for the concrete blocks for bog. I'm planning on 2 on outside and 1 on inside. Tomorrow we hope to get that finished and the redoing of some of the shelves in preparation for the next step.
 
Joined
Apr 30, 2011
Messages
807
Reaction score
424
Location
Nebraska
Showcase(s):
1
Hardiness Zone
5b
Country
United States
[sub]Pondlover dont forget the pictures! I'm thoroughly enjoying this as it feels like we're apart of your build, which is making those of us who can't get outside to work on our ponds (thanks to our weather/winter) enjoy your build! :D[/sub]
 
Joined
Mar 20, 2011
Messages
7,257
Reaction score
4,819
Location
near Effingham, Illinois
Hardiness Zone
5b
Ditto to Rebel's request. More pictures please! This is your big weekend, and we want to see how things turn out. And, don't worry over much about the liner being flat. It never will be flat (except the water WILL flatten it more than you know), but just get it as good as you can. I was a stickler about folding and pleating. In the end, you will never see it on the bottom with algae over it, but you will know it is as flat as possible. Plus, on your shelves, get it as flat as you can, so your pots won't fall over. You will know when it is as good as it gets, and then put some water in and go for it! That's the most exciting part, adding the water! I ran one well dry filling my pond, did it in 2 days I think, to make sure and not run house well dry. Lot of water goes into filling a pond the size you are making. Glad you're planning the bog, and if the liner is enough, good. If not, you will get another piece and still have the bog. And, if you have to get another piece of liner, then use ALL your liner on your pond! Maybe make it a little wider or deeper. Haha, listen to me, telling you to dig more before laying the liner! I know you're ready to fill the pond, just a thought. Also, if the bog will be additional piece of liner, make it BIG! I will plan a larger bog next to my new pond, and therefore the liner this time will be measured for the pond and bog together.
 

pondlover

Life is good today!
Joined
Jan 8, 2012
Messages
604
Reaction score
111
Location
Milan, TN
Hardiness Zone
7a
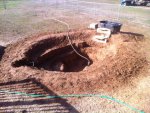
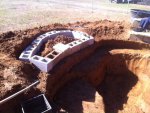
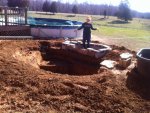
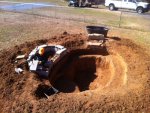
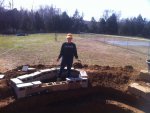
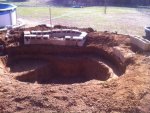
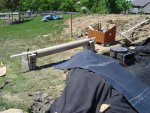
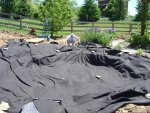
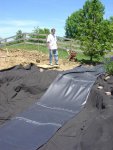
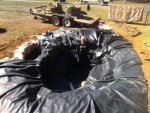
Phewww... what a day. :razz: Ok, here is what we've accomplished today. First picture shows how work began this morning. It was still pretty muddy in the very bottom, but my trooper of a husband got in and took care of it. I can honestly say that it is all coming together and I am loving every minute of it. My husband is actually starting to see what I've been trying to explain. I'm going to try and put pics on here in order, but no guarantees. We did reshape the shelves and lowered two areas to make one large shelf. Husband also did alittle more shaping to the walls and dug the bottom out evenly in the deeper area of pond. Previously we had left two areas to form a cave for the fish, but after reading threads, decided we will just create something when we are done.
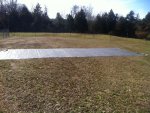
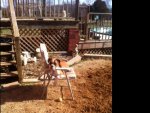
I have most of the bog area work complete. I can already see that I will eventually add on to it or create another one. Its strange how when you are digging it looks larger than it really is. I am happy with what is done, at this point. We've laid the liner out and even though temps are in the upper 40s, the sun shining has softened it alot. We have now folded it and hoping tomorrow to get it in the pond. I think we are going by Goodwill to get some old blankets to use as extra underlayment around the bog area. As you can see my dog, Cody, decided he has helped enough and was taking a much needed break. Life is good and I love my future pond!!!

CE... I took your advice and gave my husband the camera today! More pics tomorrow.
 

Attachments

  • photo (12).JPG
    photo (12).JPG
    82.1 KB · Views: 193
  • photo (6).JPG
    photo (6).JPG
    66.2 KB · Views: 213
  • photo (9).JPG
    photo (9).JPG
    81.1 KB · Views: 275
  • photo (17).JPG
    photo (17).JPG
    81.7 KB · Views: 230
  • photo (15).JPG
    photo (15).JPG
    52.8 KB · Views: 237
  • photo (7).JPG
    photo (7).JPG
    75.3 KB · Views: 205
  • photo (18).JPG
    photo (18).JPG
    70.6 KB · Views: 227
  • photo (10).JPG
    photo (10).JPG
    59.4 KB · Views: 242
Joined
Mar 20, 2011
Messages
7,257
Reaction score
4,819
Location
near Effingham, Illinois
Hardiness Zone
5b
Yippee!!!!!! I'm so glad you got your hubby to take pics with you in it, but now you have to share your hubby with us as well, or at least be sure to have pics of him doing work on the pond. It looks fantastic! I was like you, I wanted everything smooth and "finished" looking, no jagged edges.
Great idea to cover those concrete stones with blankets before the liner goes over them. The sharp edges need it. The liner is VERY tough, though, it just will give you extra peace of mind later on.
And, I love the way the shelves are looking, and that you dug it out a little deeper, at least shaped the bottom to finish. I can't imagine trying to get the liner to go around a dirt cave, so you were better off to do that with a shelf of rock later on. Be sure to put something between rocks and the liner inside the pond (even an extra piece of leftover liner will do fine), if ou set up a shelf. You may decide to leave that out, too, as you will want to see the fish, not wait for them to come out of their cave. :)
I can't wait to see more pics tomorrow as you lay the liner and begin folding and pleating ... and folding and pleating ... and ... oh, you get the idea! It's actually kind of fun. Again, I was anal, but the best idea is to fold the same direction all the way around, at least I think someone suggested that to me, and it seemed to work best. I think I did have 2 folds toward each other on the corner of a shelf, but whatever works best is the name of the game. Tomorrow will be a HUGE day, after such hard work today. Thanks so much for sharing great pics of your progress.
 

j.w

I Love my Goldies
Joined
Feb 1, 2010
Messages
33,901
Reaction score
20,873
Location
Arlington, Washington
Showcase(s):
1
Hardiness Zone
USDA 8a
Country
United States
That looks great P.L! It's always fun to see how someone does there pond. Gives us all ideas and I'm watching you build the bog so perhaps I will get brave and try one someday in mine. Looks fairly simple!
 
Joined
Apr 30, 2011
Messages
807
Reaction score
424
Location
Nebraska
Showcase(s):
1
Hardiness Zone
5b
Country
United States
Sweet lookin good! Looks like the pooch done got plain worn out watching you work! lol about what our dog did too when we were doing ours, but his touchie doesn't fit into a chair (we would have to move the couch outside for him). Can't wait until tomorrows episode!
 

pondlover

Life is good today!
Joined
Jan 8, 2012
Messages
604
Reaction score
111
Location
Milan, TN
Hardiness Zone
7a
How did everyone keep the underpayment in place while putting the liner in. Will the weight of the liner cause it to shift alot?
 
Joined
Jul 22, 2011
Messages
145
Reaction score
93
Location
Sacramento, CA USDA Zone 9b
Hardiness Zone
9b
Country
United States
My liner was 20 X 25 and it wasn't that hard. We just laid it across the hole rolled up so that most of the underlayment was exposed and we just pulled the underlayment back into place and unfolded the liner from the inside out.

This picture shows the underlayment in place and we've just draped the liner across the long dimension of the pond. It isn't quite straightened in the picture yet, but once it was then we unrolled up both sides and the underlayment didn't move.

2012-01-14_15-43-19_950.jpg
 
Joined
Mar 20, 2011
Messages
7,257
Reaction score
4,819
Location
near Effingham, Illinois
Hardiness Zone
5b
PL, I had carpet, then underlayment, and it all stayed put. BUT, I put my liner into my tractor bucket, all folded up,and lowered it to the middle of the pond bottom. So, I was unfolding the liner from the middle out. If you drag your liner to the pond bottom, it will likely drag the underlayment with it. If you start at the side you won't need any extra liner and start unfolding, you may get it done without the underlayment shifting. You can always put some concrete blocks along the top edge to hold it in place, too.
 

taherrmann4

Tmann
Joined
Mar 3, 2011
Messages
3,142
Reaction score
703
Location
Louisville KY
Hardiness Zone
6
Country
United States
My underlayment never shifted or moved, it was too heavy. Here is the contraption I made to make unrolling the liner a little easier.
 

Attachments

  • DSC00879.JPG
    DSC00879.JPG
    126.6 KB · Views: 173
  • DSC00876.JPG
    DSC00876.JPG
    113.7 KB · Views: 226
  • DSC00878.JPG
    DSC00878.JPG
    87.6 KB · Views: 188

pondlover

Life is good today!
Joined
Jan 8, 2012
Messages
604
Reaction score
111
Location
Milan, TN
Hardiness Zone
7a
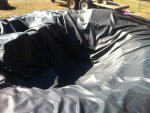
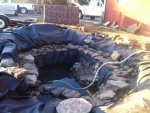
Progress update.... we got the liner in. We put it on a comforter and drug it across the lawn and kind of rolled it in the pond. I feel pretty good about the wrinkles we did get out. Probably good have gotten more out. But husband and I were both pretty exhausted and just decided it would be good as it was. LOL We put some rocks on one of the shelves to see how its going to look and I absolutely love it. I know I might have to move them, but I couldn't help myself. We put water into the bottom shelf height and are going to let it settle, will work on it more tomorrow evening. Unfortunately I was not totally comfortable about the amount of liner that would be left on one side of pond if we did the bog, so we decided we will get another piece to finish bog. Here are a few pics for updates.

It was pretty cold this morning when we first started, but its amazing how quickly you warm up. :>) I must admit that I am totally exhausted, but looking forward to the finished product. I know we still have a very long way to go and the order of business this week is to get pump ordered and filter up and running.

Thank you so much to everyone for all your words of encouragement. I still need them!!
 

Attachments

  • photo (19).JPG
    photo (19).JPG
    44.9 KB · Views: 217
  • photo (21).JPG
    photo (21).JPG
    63.7 KB · Views: 208
  • photo (26).JPG
    photo (26).JPG
    58.1 KB · Views: 173

j.w

I Love my Goldies
Joined
Feb 1, 2010
Messages
33,901
Reaction score
20,873
Location
Arlington, Washington
Showcase(s):
1
Hardiness Zone
USDA 8a
Country
United States
Looking very nice in that last picture and your rocks look real pretty in there. It will flatten out a lot more once that heavy water is all in there. Keep posting more pix and when doing the bog too cuz I'm watching closely to see how you are doing it and how it turns out.
 
Joined
Mar 20, 2011
Messages
7,257
Reaction score
4,819
Location
near Effingham, Illinois
Hardiness Zone
5b
It looks fantastic! Bet you really enjoyed laying those rocks, as that gives you more of a look of "finished". :) Enjoying your progress. Hope you have more great weather as the week goes on. I just checked, and IL supposed to have only 2 days with LOWS below freezing in the next 10 days, so assume your temps are warmer still. Woohoo, and it's almost February. Unbelievable.
 

Ask a Question

Want to reply to this thread or ask your own question?

You'll need to choose a username for the site, which only take a couple of moments. After that, you can post your question and our members will help you out.

Ask a Question

Members online

No members online now.

Forum statistics

Threads
31,559
Messages
518,875
Members
13,805
Latest member
FawnWolfe

Latest Threads

Top