Our new pond - Started Fall 2011 - Complete - ?

Joined
Jul 10, 2012
Messages
427
Reaction score
152
Location
West Chester, PA
Showcase(s):
1
Got two better pictures of the filling of the pond than what I had above.

The first pic is the "before" pic.

The second pic is the "after" pic".

It's been full all this week now and has the most water in it that it ever will. I'll let it stretch and settle the liner to the weekend. You can see I've already done a preliminary trim of the liner aroudn the three sides. On Friday evening I'll pump a few inches out to get the level down below the blocks seen in the far back and let the exposed liner dry out. This also will expose the "shelf" around the other three sides where I'll set the half blocks that I showed being cut in half a few posts up. The blocks on the back wall are full blocks and will be glued to each other and interlocked into the side walls and some back fill will be put in the bottom of the waterfall reservoir.

Than I'll start building up the back walls where the waterfall will be. Once the back wall is done, I'll put in the half blocks around the sides and glue on the capstones.

Hopefully, if the weather permits, I'll have most of the waterfall back walls completed this weekend.
 

Attachments

  • photo2.JPG
    photo2.JPG
    62.3 KB · Views: 462
  • photo3.JPG
    photo3.JPG
    60.8 KB · Views: 495
Joined
Jul 10, 2012
Messages
427
Reaction score
152
Location
West Chester, PA
Showcase(s):
1
Seeing a thread in another forum about the satellite photos got me to thinking to see what was out there about my house!

So I called it up in Google maps and did a screen capture of the photo. I've attached it below.


This is not current and was probably taken sometime in the fall of last year, (2011). You can see the current pond in the front of house. You can easily see the "Z" wall that separates the upper pond from the lower pond. The white square next to it is a pergola with a canvas top we built.

This pic was taken just after we had the concrete poured on the new foundation. The tire ruts are visible at the top right corner of the foundation. The white strip on the right side wall are planks across the foundation trench we used for the wheelbarrows to wheel in the concrete for areas the truck wasn't able to reach.

It'll be interesting to see if we get an updated satellite photo this fall or winter sometime to see how often they update the photos for our area.

Craig
 

Attachments

  • Pond_Sat.jpg
    Pond_Sat.jpg
    90.9 KB · Views: 410
Joined
Jul 10, 2012
Messages
427
Reaction score
152
Location
West Chester, PA
Showcase(s):
1
Made some great progress on Friday and Saturday. Today sucks as its raining. But I did get a lot done and have made good progress on the upper waterfall section.

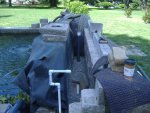
I finished glueing in all the block for the pond trough. In the first pic you can see one of the returns for the pond and the 1/2" water fill line at one end. The liner on the right is the end of the liner from the main lower pond. It will serve as extra protection for the trough liner. Should the trough leak, or overflow, this liner will cause most the water to flow back into the lower pond.

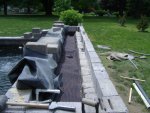
The second pic is a picture in the opposite direction. It shows the second return line going to the other end of the trough.

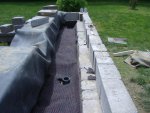
In the third pic, you can see on the right hand side of the trough that we have dropped in carpet to serve as padding between the bottom stone and the upper liners. Some stone as been added in already. The carpet and extra liner will be folded down over the stone once enough stone has been added to bring it up to the proper height.
 

Attachments

  • 06OCT2012_1.jpg
    06OCT2012_1.jpg
    46.7 KB · Views: 422
  • 06OCT2012_2.jpg
    06OCT2012_2.jpg
    60.8 KB · Views: 457
  • 06OCT2012_4.jpg
    06OCT2012_4.jpg
    61 KB · Views: 412
Joined
Jul 10, 2012
Messages
427
Reaction score
152
Location
West Chester, PA
Showcase(s):
1
So we finally backfilled the area up with the stone. That was quite a chore that was done by filling a 15 gallon bucket up with the stone in the driveway, carting it by dolly around to the pond, and then lifting it up over the wall and dumping it. repeat, repeat, repeat... my son helped me considerably with this step!

In pic one below, we have now folded down the carpet.

In pic two the excess liner from the bottom liner was folded over into it. We also added additional scraps of carpet on the right hand side to protect the trough liner from the block wall stone. The blocks sitting in the trough were just placed there temporaily to hold the side carpets up on the right and the extra rubber liner up on the left.

In pic three we have dropped in the liner and began to add water. We basically drapped this over the top, reached under it and removed the temporarily blocks and fitted the liner into place.

Pic four: My son!! :)

In pic five, we are just filling it up now. We filled it and adjusted and readjusted the liner, and readsjusted, and readjusted.. etc.. as it filled.

That's about where we left it end of day Saturday. Supposed to be nice this week so hopefully I can maybe leave work early a few nights and hopefully get a lot of work done this week on it.

Next steps will be to trim the upper liner, put in the waterfall weir, and than start work on the final trim on both top and bottom sections and install the capstones. Maybe another 2 weekends?
 

Attachments

  • 06OCT2012_8.jpg
    06OCT2012_8.jpg
    69.3 KB · Views: 423
  • 06OCT2012_10.jpg
    06OCT2012_10.jpg
    59.2 KB · Views: 444
  • 06OCT2012_11.jpg
    06OCT2012_11.jpg
    55.5 KB · Views: 403
  • 06OCT2012_12.jpg
    06OCT2012_12.jpg
    55.4 KB · Views: 461
  • 06OCT2012_13.jpg
    06OCT2012_13.jpg
    52.2 KB · Views: 428
Joined
Jul 10, 2012
Messages
427
Reaction score
152
Location
West Chester, PA
Showcase(s):
1
Getting close every week.... But fall is here, leaves are coming down and it's time to cover the ponds up for the winter. So wrapping up for the winter now.

Pic 1: Waterfall mostly complete now. Weir in place. Still need some side pieces. Spring job.

Pic 2: Got caught by the boss taking too long a break.

Pic 3: Overflow pipe inserted into top blocks. Will have to cut a depression into the capstone some as the bulkhead fitting is higher than the wall. Shouldn't be a problem.

Pic 4: Capstone marked up for cutting out a depression/hollow spot for the overflow bulkhead.
 

Attachments

  • 99.jpg
    99.jpg
    51.3 KB · Views: 427
  • 98.jpg
    98.jpg
    86.8 KB · Views: 446
  • 108.jpg
    108.jpg
    50.4 KB · Views: 419
  • 117.jpg
    117.jpg
    49.6 KB · Views: 395
Joined
Jul 10, 2012
Messages
427
Reaction score
152
Location
West Chester, PA
Showcase(s):
1
Primarily just capstones now left to glue into place.

Pic 1: Most of the capstones are in place already. Just thought I'd show a few pics of gluing them in.
This is the next section to be done. Everything was dryfitted first. Then the capstones picked up in order and stacked. Glue would be put down. One strip on the inside block and one strip on the outside block.

Pic 2: The glue has been put down. Glue was also used on the capstones edges to glue them to each other as well as gluing them down to the block. If you plan on doing anything like this yourself, or a regular block retaining wall, plan on using 2-3x the amount of glue that the block supply house tells you to buy. DIY'ers always put on more than needed. And when you are talking about holding back a lot of water, why be stingy with the glue? As long as the glue doesn't start to pop out of the seams where it can be seen, you're Ok.

Pic 3: Just about all done. I have a four corners (two on the waterfall and the two out of sight of the picture to the left and right), to be done which hopefully I'll knock out tomorrow.

Yes... the water is VERY green now! No filter is running on this at this time, just aeration. No fish are in it either. The filter and UV will be moved over during the winter after a full servicing. Fish will be moved over in the spring from the old pond after the new pond is started up.
 

Attachments

  • 113.jpg
    113.jpg
    73.4 KB · Views: 396
  • 114.jpg
    114.jpg
    60.5 KB · Views: 408
  • 120.jpg
    120.jpg
    70.1 KB · Views: 437
Joined
Jul 10, 2012
Messages
427
Reaction score
152
Location
West Chester, PA
Showcase(s):
1
Ok.. so we are pretty much done for this year. Here are two pics of what is pretty much the final product.

The front corner capstones have not been cut and fitted yet. So they don't quite look right in the picture. I hope to get them done tomorrow but wanted pictures before I covered the pond with netting.

It's looks bad right now as their is no landscaping, no decking and no plants in the pond. The plan is a large lotus in each corner on either side of the waterfall. The waterfall area will be filled with plants TBD, some of which will drape down and hang over the wall into the pond.

On the opposite end of the pond away from the waterfall, a tropical lily in each corner. They hold up pretty well to the koi with their heavier stems and leaves.

A deck level with the lower pond wall on the one side, landscaping and patio around the other sides.

Maybe... possibly... we'll see it done by this time next year!!!! Wish I was retired so I could do this fulltime! Donig it all by yourself is rewarding, but can really eat into your time. And unfortunately, life always throws curves at you.. family issues.. work emergencies, bad weather... I think a Murphy law is that when building ponds, work and family emergencies only happen on sunny, nice days. They always take away from pond building and never happen on rainy days when you can't work on the pond!

Anyway, in pic 3 we've put the netting on it. It's just staked down temporarily for the night. I'll finish stretching it out and getting the stakes in the right place tomorrow. It only has to last this winter. Once the deck is done next year I'll have to redo how I tie it down for next winter.
 

Attachments

  • 118.jpg
    118.jpg
    81.2 KB · Views: 431
  • 119.jpg
    119.jpg
    89.5 KB · Views: 419
  • 121.jpg
    121.jpg
    40 KB · Views: 432
Joined
Jul 10, 2012
Messages
427
Reaction score
152
Location
West Chester, PA
Showcase(s):
1
Ok.. so I figured it's time I update this site and the progress we've made. No.. the pond is not done. LOL Are they ever? But we have made some substanial progress.

First off.. the plastic pre-fabbed shed we were going to use a pump- house? Yeah... that didn't work out. We tried bolitng on plywood on the inside surfaces of it. But no matter what I tried, the plastic sides bowed somewhere, somehow. So as a result I had to build a pump house from scratch. I don't have many pictures of it during construction, but here's the finished product of it.

My wife had to decorate it of course. :blueflower:
 

Attachments

  • IMG_0150.jpg
    IMG_0150.jpg
    65.8 KB · Views: 302
  • IMG_0151.jpg
    IMG_0151.jpg
    94.9 KB · Views: 317
Joined
Jul 10, 2012
Messages
427
Reaction score
152
Location
West Chester, PA
Showcase(s):
1
Ok.. I did find one of the shed under construction.. but it's really a video working my SAR dog, Meadow on the ladder.

Any opportunity to train you take!

I put it on youtube and it looks like it links in fine here.

 
Joined
Jul 10, 2012
Messages
427
Reaction score
152
Location
West Chester, PA
Showcase(s):
1
So..the pump house was done, and the filter moved. This was all done in early spring before we had to start up our old pond. Once the filter and UV was running for a few days, we decided to transfer a few fish. We moved our least favorites first! But all went well and within about a week we had all of the fish moved over.

Here's some pics of the koi checking out the new digs.
 

Attachments

  • IMG_0108.jpg
    IMG_0108.jpg
    54.8 KB · Views: 358
  • IMG_0107.jpg
    IMG_0107.jpg
    55.2 KB · Views: 324
  • IMG_0099.jpg
    IMG_0099.jpg
    47.8 KB · Views: 342
  • IMG_0118.jpg
    IMG_0118.jpg
    26 KB · Views: 307
Joined
Jul 10, 2012
Messages
427
Reaction score
152
Location
West Chester, PA
Showcase(s):
1
But of course Murphy had to rear his ugly little head. :boldblue: It was obvious that it wasn't just the rainy weather. We had a significant leak somewhere in the water fall. And we only had one of the two pumps running at this time. To make matters worse, the wife and I both decided that having both pumps going to the waterfall would be too much. But the plumbing was done and everything was run!!! Oh well.. yes... in order to find the leak and redo the plumbing, we had to shutdown the waterfall and tear down part of the waterfall. Well, the problem was found. It was a bad joint on one of the 90's on one of the returns. So here's some advice... don't use the cheap 90's from home depot or other chains. Those 90's only have about 1/2" of contact with the connecting pipe. Goto a regular plumbing supply house and get the full 90's that have a good 1.5- 1.75" of contact with the connecting pipes. When using with flex pipe it is much less likely the pipe will work itself apart and leak if the glue wasn't done quite right. The full contact pieces are much better. I knew this. :banghead3: I had gotten almost all my supplies at a plumbing supply house. But I just used one I had laying around cause I was too lazy to run out to the plumbing supply house again. Anyway..

We ripped it apart, found the problem, pulled out the two returns (one at each end), and replaced it with one that came up in the center.

In this first pic, we have taken out most of the backfill stone we had used. When we ran the new pipe we placed used bricks on both sides of it and then placed narrow pieces of flagstone on top of the bricks to help protect the pipe somemore. Another important thing we found out. We had noticed on pulling out the old flex pipe that even just after one winter, the back filled stone that was in direct contact with the flex pipe caused considerable wear on the pipe. The PVC rings in the flex pipe were actually exposed in a few places. So we got rid of most all the flex pipe in the waterfall and use the hard plastic pipe instead.

DSCF1087.JPG
 
Joined
Jul 10, 2012
Messages
427
Reaction score
152
Location
West Chester, PA
Showcase(s):
1
In these two pics we have finished backfilling, we reinstalled the carpet and are about to put the liner back in place. We used a bulkhead fitting to go through the liner. Unfortunately I don't have a picture of that after it was done.

DSCF1088.JPG

DSCF1089.JPG

Oh.. and once that was all done.. we STILL had a leak! But only when the pond was REALLY full. Soooo.. yes.. we isolated this leak to one corner of the water fall. It turned out to not really be a leak at all. One of the folds in the corner of the main, lower pond liner shifted after we had put everything together. As a result one part of the fold was lower than the rest and the lower pond liner was actually being overtopped by the water when it was filled to the point of the overflow pipe. The excess water just happenned to find a path under the waterfall area that made it look like the upper reservoir or piping was leaking. I was able to refold the liner and adjust it so that this was fixed. Another day lost on fixing a leak!!!
 
Joined
Jul 10, 2012
Messages
427
Reaction score
152
Location
West Chester, PA
Showcase(s):
1
Ok.... thought I'd throw this in.

The video here shows something I really haven't seen before. The baby fish in the video is about 5-6" and was born in our pond last year. We brought it in to our indoor pond for the winter with the rest of the babies. This spring, once the new pond was accepting fish, we moved it outside. Now two of the fish in the pond are the parents. But we have no clue which one. Obviously the baby Koi doesn't either becuase it shadows all of the fish and doesn't play favorites! I'm not sure what promoted this behavior as we didn't see it until several weeks after the baby Koi was brought outside. But I thought it's kind of cool.

 
Joined
Jul 10, 2012
Messages
427
Reaction score
152
Location
West Chester, PA
Showcase(s):
1
One of the things we had to do was repot and move our lotus. This was a mess as we hadn't repotted this thing for probably ten years.

This is what the mess looked like after we cut the pot away.

Screen Shot 2013-08-08 at 11.13.21 PM.jpg

This is what we had to eventually tease out of the mess.

Screen Shot 2013-08-08 at 11.13.34 PM.png

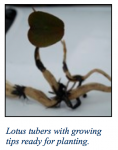
This was one of the actual pieces we got. My wife took the picture above for our club newsletter.

We probably could have made about 100 lotus's from this one! But we made just two and threw a couple into the indoor pond as spares just in case we messed one up.

This is one of the new lotus's about 2-3 weeks after being potted.

Image 1.jpg
 
Joined
Jul 10, 2012
Messages
427
Reaction score
152
Location
West Chester, PA
Showcase(s):
1
Ok, so now we needed something to put the pots on in the pond. We decided on black milk crates with a stone "table top" on top. We traced the lotus pot onto some paper, made a cutout of it and transferred that to onto two large flat stones. I then used a saw to cut the stone to the approximate size of the pot.

These pics show the final result.

I didn't think about it until after we put these in the pond. But I should have gotten a pot or box just slightly smaller than the milk crates and plant anacharis in it. I could have put it on the bottom and put the first milk crate over top it and continued stacking. It would have grown up through the milk crates to the top and out the sides. The Koi would never be able to get to it all and it might continue growing. It would be a cool way to disguise the milk crates in the pond. I might have to try that next year.
 

Attachments

  • Image 2.jpg
    Image 2.jpg
    62.4 KB · Views: 323
  • Image 3.jpg
    Image 3.jpg
    54.3 KB · Views: 297

Ask a Question

Want to reply to this thread or ask your own question?

You'll need to choose a username for the site, which only take a couple of moments. After that, you can post your question and our members will help you out.

Ask a Question

Members online

Forum statistics

Threads
31,548
Messages
518,743
Members
13,786
Latest member
ksh

Latest Threads

Top