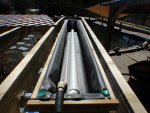
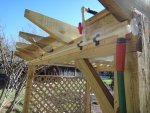
A "Sky Bog"

Joined
Apr 27, 2015
Messages
449
Reaction score
717
Location
Southern Maine
Hardiness Zone
5
Country
United States
....................... if this works.................................
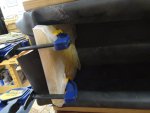
Right there is the whole thing! :)

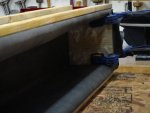
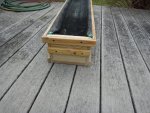
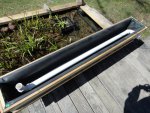
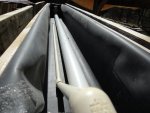
Installed the liner and added the trim pieces to the troughs.
DSC02246.JPG DSC02247.JPG

Slow progress, but perhaps a couple items of interest......
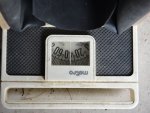
Each trough weighs 38 lbs with trim and EPDM liner. I rounded up to 40 pounds.That translates to 20 pounds per cleat so far. Excellent.
DSC02244.JPG DSC02245.JPG

With a little more figuring I came up with the following: (round figures)
Inside dimensions, 7"X 7"X 66" = 3234 ci. A gallon of water is approx 231 ci so, 3234 divided by 231 = 14 gallons. A gallon of water is 8.32 lbs. thus 14 X 8.32 = 116.48 lbs. (116.5).
Adding the water weight to the box weight we get 116.5 + 40 = 156.5 lbs. This comes up to 78 lbs per cleat. Still well within reasonable limits.
What I don't know yet, is what 5" of pea gravel will weigh, but am confident an entire trough mounted and loaded will be under 200 lbs.
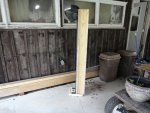
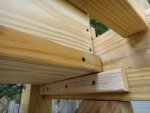
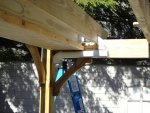
I think the installed cleats would be adequate, but for added insurance (and peace of mind,) I'll add another cleat to the box on the area exposed above the header that will rest on the upper header edge. (Last photo in the original post. I'll add another photo to clarify this.) With this addition the Sky Bogs will be supported in two places on each end....should be plenty.
 
Joined
Apr 27, 2015
Messages
449
Reaction score
717
Location
Southern Maine
Hardiness Zone
5
Country
United States
Here's another update.
Added the additional cleat, got the bogs water tested and mounted today. The extra cleat is very subtle and I don't think distracts from the appearance at all. Once I got the troughs up I suspended myself from the middle of each and bounced around a little. There was no sign of any movement at all, and I exceed the 200 lb target.:)
This is the "safety" cleat;
DSC02254.JPG DSC02255.JPG
It rests on top of the header on the outside.
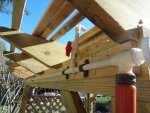
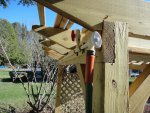
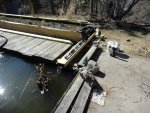
Have also roughed-in some of the supply plumbing. The hose will provide pond water from a submerged pump. It will be supported by clamps to prevent any undue stress on the shut-off valve. Each trough will have a ball valve to regulate the volume of flow and will also serve to isolate each one. These will also prevent siphoning water out in the event the main shut-off valve fails or a leak develops. When the pump isn't working the gate valve will be closed or the bogs will certainly siphon out. I prefer not to use vacuum breaks only because the siphon is actually the way I will empty the water in the troughs if it becomes necessary. The pipes will go over the rear ends of the bogs and from there a short piece of rubber hose will be attached to a short nipple then back to plastic pipe with holes drilled in it the under the gravel. The rubber hose is to provide a break-point to allow the system to be opened.
DSC02261.JPG DSC02259.JPG
All of the pipe will be painted with a plastic specific paint to blend in.
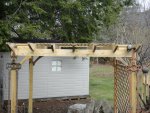
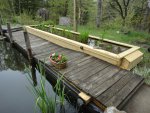
From a short distance the "Sky Bogs" are hardly noticeable and unless pointed out, I doubt anyone would really notice.
DSC02256.JPG
One caveat: If I were to do this again, (and I may do it this time to one trough in the name of "science":)) I think I would coat the inside of the bogs with epoxy. I'm very tempted to do one now leaving the other lined with EPDM just to see if there is any appreciable difference in performance or longevity. Obviously the EPDM can expand and contract in different weather conditions, where the epoxy is somewhat less forgiving without the fiberglass reinforcement.
The real advantage to these bogs are if there is a problem, or if a leak develops it would be very evident and they are easily removed, (may have to unload the gravel, but that's easier than draining a pond...) repaired and replaced as neither one is fastened, they just sit there.
Now I have to bury the supply hose and develop the returns. I think "She who must be obeyed" has some domestic items I have to attend to before I can return to these important matters!:D
 
Joined
Oct 27, 2011
Messages
1,993
Reaction score
1,786
Location
BC Canada
I"m assuming you will have your pond water circulating through those bogs? The intake is easy enough, but the return lines could be more problematic if you don't want the water to overflow the troughs. How do you plan to design the return water ports?
 
Joined
Apr 27, 2015
Messages
449
Reaction score
717
Location
Southern Maine
Hardiness Zone
5
Country
United States
I"m assuming you will have your pond water circulating through those bogs? The intake is easy enough, but the return lines could be more problematic if you don't want the water to overflow the troughs. How do you plan to design the return water ports?

I haven't quite decided which way I want to go, but have two methods in mind;

1. On the opposite end of the trough from the supply (pond side), I may cut the inboard side of each trough down about two inches for a distance of four or five inches and fasten a flat-sided funnel to the outside with the EPDM over-lapping the edge. (Very much like I did with the above-ground bog.)
DSC00977.JPG DSC00911.JPG

Each bog funnel pipe would have a removable clamped section that would join at a tee fitting behind the pond-facing header, and from there it's just a matter of piping with 1 1/2" PVC keeping it all tucked up as out-of-sight as I can before I reach the down pipe. At the base of the down pipe there will be a transition from hard pipe to direct bury 1 1/2" flex hose from there to the pond. I want to use the flex hose because it won't be buried that deep, and I don't want frost to crack/break the PVC. I'll blow out and cap the hose in the winter.

2. The second option (most likely) is to pierce the lower inboard sides of each trough and insert a 1 1/2" close nipple with a 90 degree elbow inside the box facing forward. A 60" +/- piece of pipe, and at the end of this will be a 90 facing up. The pipe coupling on the outside of the box needn't be sealed, but the 90 on the inside will be drawn up tight (by the outside fitting) to the EPDM with a slathering of that evil black stuff out of a tube to prevent any leakage. A short section of PVC pipe will come up to the surface (at whatever level is decided) allowing the return water to simply "fall" into the open surface drain, through the 90 hence to the tee and back as in #1 to the down pipe etc.

I'm leaning towards #2 as it would be less hassle and not exposed to wind before entering the return pipe. I intend to put a dome-shaped screen above the stand pipe with a diameter of probably 6-7" so should a leaf or something obscure one area there would be sufficient area remaining to prevent the bog overflowing.

In a few days I should have these parts installed and I'll post a couple photo's of how it worked out.
 
Last edited:

Meyer Jordan

Tadpole
Joined
Oct 10, 2014
Messages
7,177
Reaction score
5,678
Location
Pensacola, Florida
Hardiness Zone
9a
Country
United States
I haven't quite decided which way I want to go, but have two methods in mind;

1. On the opposite end of the trough from the supply (pond side), I may cut the inboard side of each trough down about two inches for a distance of four or five inches and fasten a flat-sided funnel to the outside with the EPDM over-lapping the edge. (Very much like I did with the above-ground bog.)
View attachment 90555 View attachment 90556

Each bog funnel pipe would have a removable clamped section that would join at a tee fitting behind the pond-facing header, and from there it's just a matter of piping with 1 1/2" PVC keeping it all tucked up as out-of-sight as I can before I reach the down pipe. At the base of the down pipe there will be a transition from hard pipe to direct bury 1 1/2" flex hose from there to the pond. I want to use the flex hose because it won't be buried that deep, and I don't want frost to crack/break the PVC. I'll blow out and cap the hose in the winter.

2. The second option (most likely) is to pierce the lower inboard sides of each trough and insert a 1 1/2" close nipple with a 90 degree elbow inside the box facing forward. A 60" +/- piece of pipe, and at the end of this will be a 90 facing up. The pipe coupling on the outside of the box needn't be sealed, but the 90 on the inside will be drawn up tight (by the outside fitting) to the EPDM with a slathering of that evil black stuff out of a tube to prevent any leakage. A short section of PVC pipe will come up to the surface (at whatever level is decided) allowing the return water to simply "fall" into the open surface drain, through the 90 hence to the tee and back as in #1 to the down pipe etc.

I'm leaning towards #2 as it would be less hassle and not exposed to wind before entering the return pipe. I intend to put a dome-shaped screen above the stand pipe with a diameter of probably 6-7" so should a leaf or something obscure one area there would be sufficient area remaining to prevent the bog overflowing.

In a few days I should have these parts installed and I'll post a couple photo's of how it worked out.


Whichever way you decide your outlet must be at least twice the size of your inlet since this will be gravity feed outflow. It may need to be much larger depending on your flow rate.
 
Joined
Apr 27, 2015
Messages
449
Reaction score
717
Location
Southern Maine
Hardiness Zone
5
Country
United States
Whichever way you decide your outlet must be at least twice the size of your inlet since this will be gravity feed outflow. It may need to be much larger depending on your flow rate.

It is. The supply is 1/2" and relatively low flow because of distance and height from the pump, whereas the returns are 1 1/2". I am also incorporating ball valves on the supply lines to each trough for throttling and or isolation should the need arise.
 
Joined
Apr 27, 2015
Messages
449
Reaction score
717
Location
Southern Maine
Hardiness Zone
5
Country
United States
After a little debate with myself I decided "Option 2" was the way to go.
Here's the basic set up for one of the bogs;
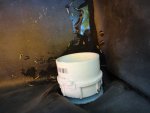
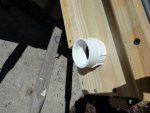
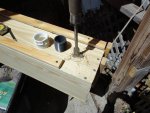
A 1 1/2" close nipple was let into the side of the trough with threaded adapters on each side. This allowed putting some goop on the inside and drawing the nipple up tight from the outside. Continuing on the inside, is a street 90, a length of pipe, another 90 and a short riser. The riser can be changed out later to increase/decrease the depth of water in the trough. Nothing inside the trough will be glued, just tapped together.
DSC02271.JPG DSC02274.JPG DSC02275.JPG DSC02278.JPG
The reason for the return pipe running inside the bog is twofold: It's a weight saver as it will displace a small amount of stone, and since I wanted all of the piping towards the back of the pergola, I would have had to run the same length of pipe anyway. May as well keep it "as clean" as I can.
Until I paint the pipe it'll look like anyone's cellar anyway.:)
I did end up notching one of the "rafters", but at the same time cut a small piece of exterior bottom trim off so I could move the whole trough closer to the support legs. Not a big deal, but I think cleans up the angles and joinery a little. Here's what the outside looks like now;
DSC02288.JPG
Once painted, I'd like to think it will all but disappear.
Looking in the inside, the small pipe is the supply controlled by a ball valve, and the return pipe being the larger. Each line (supply and return) have a rubber clamped section very close to the box which will facilitate dis-assembling should the need arise.
DSC02285.JPG DSC02286.JPG
I'm also very inclined to using lava rocks as the medium in these troughs. I'm thinking 3 bags each should do the trick, for the volume I need.
In this last photo I decided to add another hose bib (on the far side of the pergola,) so we can draw water for the watering can without bending over and drawing water from the pond. (It'll be brought down to a comfortable height with a hook to hold the can while it's filling) Is that lazy or what??:D(y)
DSC02290.JPG
 
Last edited:

Meyer Jordan

Tadpole
Joined
Oct 10, 2014
Messages
7,177
Reaction score
5,678
Location
Pensacola, Florida
Hardiness Zone
9a
Country
United States
Are you sure about the Lava Rock? I am cautious as to whether it will supply the support and anchoring for the plants that will be needed.
 
Joined
Apr 27, 2015
Messages
449
Reaction score
717
Location
Southern Maine
Hardiness Zone
5
Country
United States
Are you sure about the Lava Rock? I am cautious as to whether it will supply the support and anchoring for the plants that will be needed.

The jury is still out on this.
Next time I go uptown I'm going to compare the density of the pea gravel and lava rock. I understand what you're saying about the root retention. I suspect once the roots have spread sufficiently they'd be fine, but getting to that point is the thing. There's not going to be a strong current through the bogs, but I really don't know. Might be a good chance for a long term experiment......one trough with lava rocks, one with pea gravel. They will both have equal sun, equal flow characteristics, same pond water etc. It wouldn't break the bank to abandon one media if it didn't perform to expectations............
 

addy1

water gardener / gold fish and shubunkins
Moderator
Joined
Jun 23, 2010
Messages
44,939
Reaction score
29,966
Location
Frederick, Maryland
Showcase(s):
1
Hardiness Zone
6b
Country
United States
I had plants anchored in lava rock in my arizona pond, they did quite well. Where they were anchored was also a lot of flow. I just put the plants in deep enough with enough rocks around to hold them there while they established themselves.
 

Ask a Question

Want to reply to this thread or ask your own question?

You'll need to choose a username for the site, which only take a couple of moments. After that, you can post your question and our members will help you out.

Ask a Question

Members online

Forum statistics

Threads
31,540
Messages
518,627
Members
13,774
Latest member
Keith94

Latest Threads

Top